Navigating the Night Sky#
When you first launch Stellarium, the default settings will show you the sky as it appears from your location at the current time and date. You can use the arrow keys or left-click and drag to pan around the sky. Use Ctrl+up and Ctrl+down or PgUp, PgDn to zoom in and out. You can also use mouse scroll wheel or laptop touchpad. Shift+N, S, E, W, Z will move to the North, South, East, West, or Zenith. Ctrl+H will bring you back to the default view. The F1 key will open a help dialog with all of the keyboard shortcuts. They can also be found in Appendix A. of this document.
Coordinate Grids#
There are two buttons on the bottom toolbar to display the equatorial and horizontal coordinate grids. The e and z keys will toggle display of the equatorial and horizontal grids respectively. The period . will toggle display of the equator, comma , the ecliptic, and semi-colon ; the meridian. The equatorial grid is for the equator of date. The markings tab of the sky options dialog allows you to display and customize the appearance of many more. The sky and viewing options are accessed by pressing F4 or the third button from the top on the left toolbar. See Appendix A. for keyboard shortcuts for displaying the various other sky markers.

Fig. 7 Sky markings#
You can toggle the display between alt/azimuth and equatorial mount mode by pressing Ctrl+M on the keyboard. In alt/azimuth mode objects will be displayed with their orientation relative to the horizon. In equatorial mode they will be displayed North up and East left.
Selecting Objects#
You can select objects in the sky by left-clicking on them. The selected object will be highlighted and information about it will be displayed in the top left corner of the screen. Pressing the space bar will center the selected object in the view. Pressing the / key will zoom in on the selected object and the \ key will zoom back out. Right-clicking on the screen or Ctrl+Space will deselect the object. Selected objects will by default remain centered when you fast forward time so you should deselect objects if you want the horizon to remain stationary
Finding Objects#
The search button or F3 key will bring up the search dialog. You can also search for objects by typing the name of the object you are looking for. Stellarium will show you a list of possible matches. Select the object you want and press Enter.
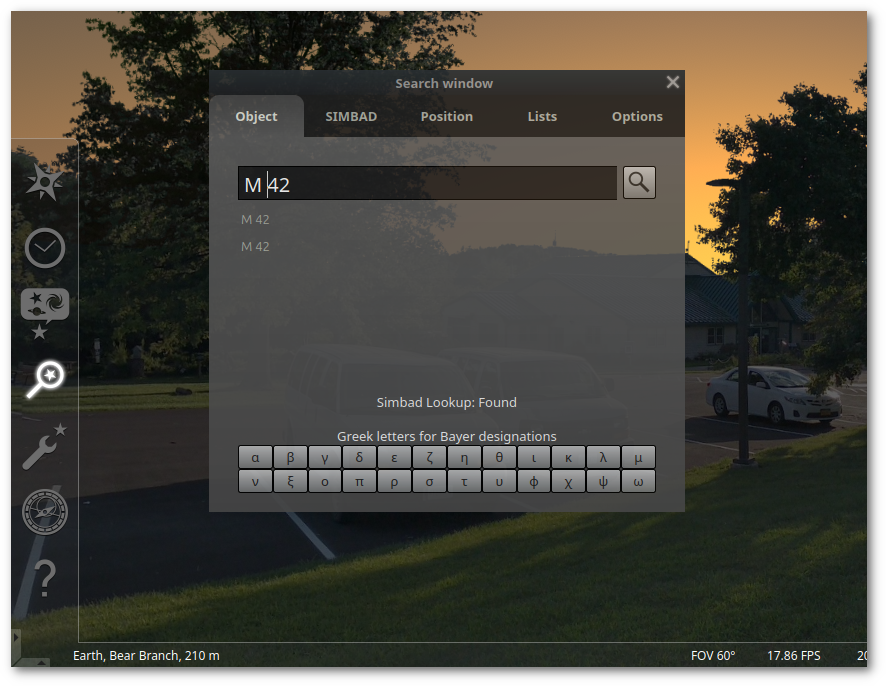
Fig. 8 Search dialog#
There is a tab to query SIMBAD for more information about a selected object. More information about SIMBAD can be found at the CDS Portal.
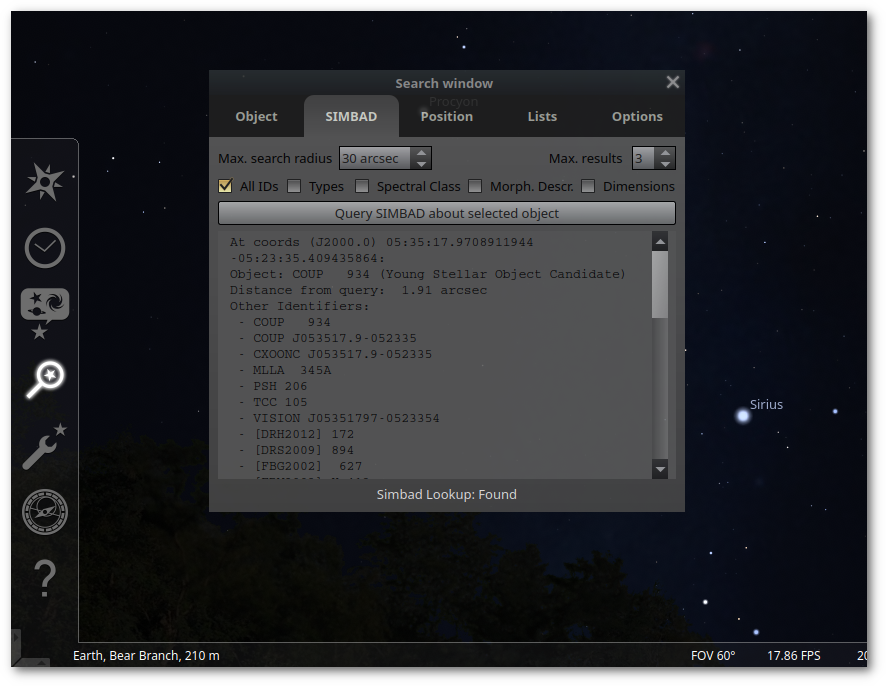
Fig. 9 SIMBAD query#
On the position tab you can manually enter coordinates in any of the supported reference frames (Equatorial, Horizontal, Galactic, SuperGalactic, or Ecliptic).
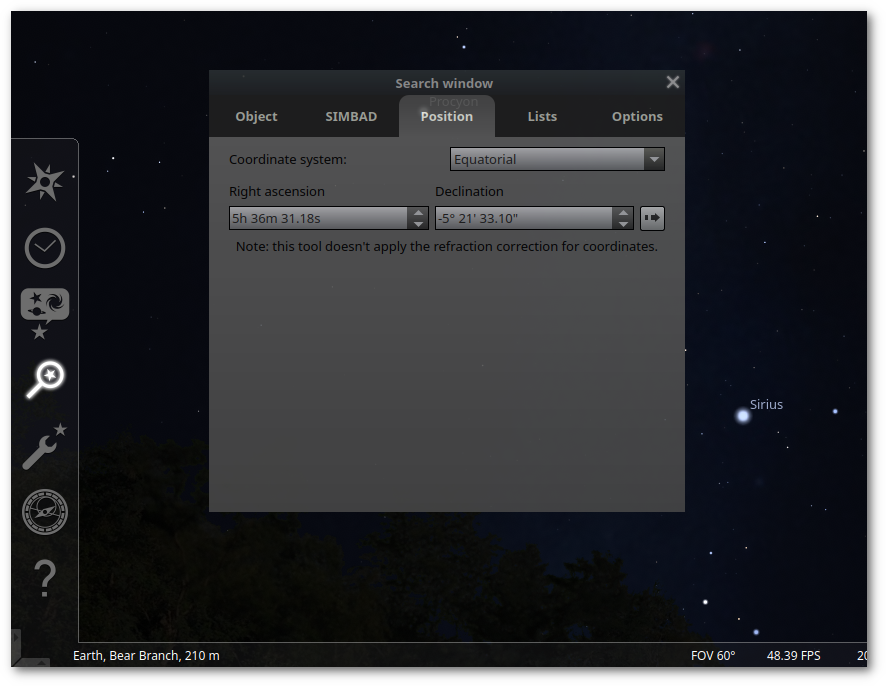
Fig. 10 Position dialog#
There is also a tab to search for objects by name in the various catalogs and observing lists.

Fig. 11 Object lists#
Constellations#
You can display constellation lines and labels by pressing the C and V keys respectively. The R key will toggle the constellation art. The B key will toggle the constellation boundaries. The Alt+A key will toggle the asterism lines and the Alt+V key will toggle the asterism labels. The default constellations and boundaries are the modern IAU constellations. You can select additional constellations from the Sky Cultures tab in the Sky and Viewing Options dialog.
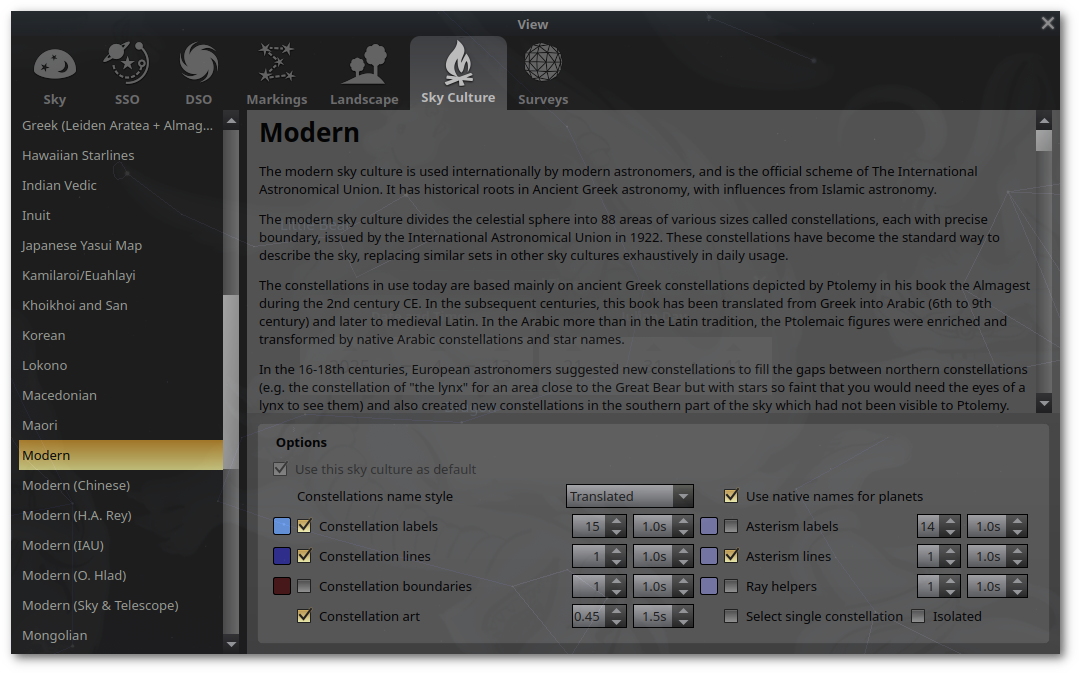
Fig. 12 Sky culture#
Solar System#
You can display Solar System objects by pressing the solar system button on the bottom toolbar or P on the keyboard. Alt-P will toggle display of Solar System labels. The O key will toggle display of the orbits of Solar System objects. The Shift+T key will toggle display of the planet trails.
The SSO (Solar System Object) tab in the Sky and Viewing Options dialog allows you to customize the display and appearance of Solar System objects.
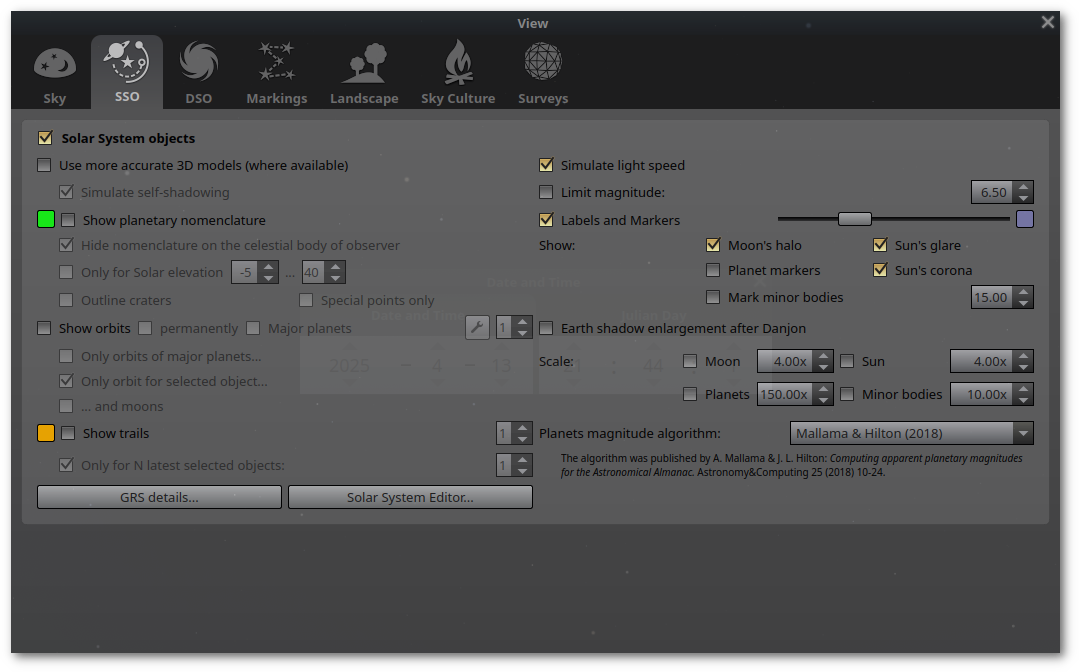
Fig. 13 Solar System#
Deep Sky Objects#
The DSO button on the bottom toolbar or D on the keyboard will toggle display of Deep Sky Objects (DSOs). Pressing I on the keyboard will toggle display of the background images for DSOs. On the extras tab of the configuration window you can enable a toolbar button to display background images.
The default catalogs for DSOs are the Messier and NGC-IC catalogs. You can select additional catalogs and configure display options from the DSO tab in the Sky and Viewing Options dialog.
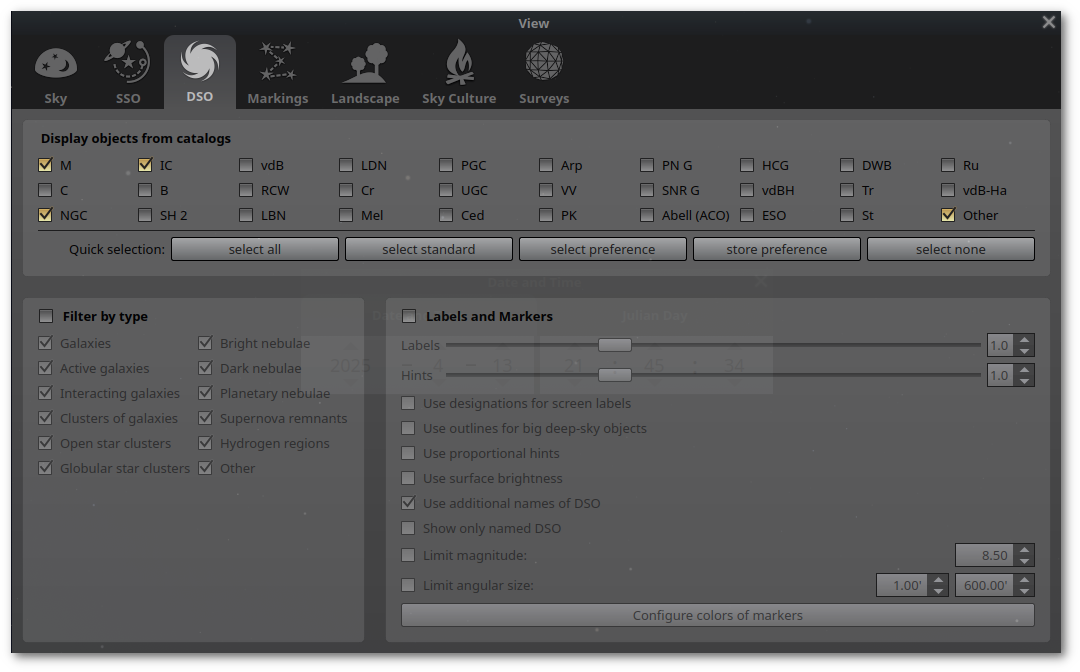
Fig. 14 Deep Sky Objects#